¶ Category Setup
¶ Introduction
The Categories module is where you will add the first bit of structure to your gradebook. Categories allow you to divide your assigments up into like content and type.

¶ Creating a New Category
To create a new category, hit the the plus (+) button located at the bottom of the Categories module. There is also another plus (+) button located at the very bottom right of your screen while in the Categories module.
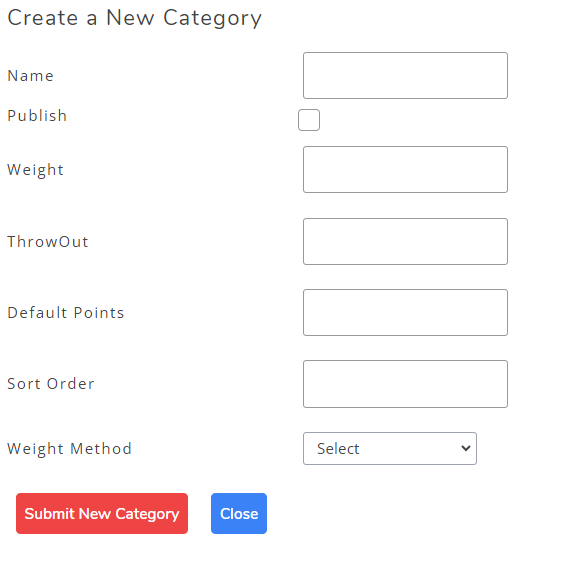
You will be given a modal like you see above. The only required field is the name, otherwise the rest you can fill out at another time.
What does each element of a category do?
Name - This is used to identify the new category. By selecting the name input, you will be given suggestions for names (of which you can select to use), or you can create your own category names.
Publish - This decides if you want to immediately publish the category, or not. This is optional, and you do not need to select it when creating a category.
Weight - If you selected the weighted categories option for the overall scoring method, then you will need to set a weight for the category. This is optional, however you will be required to fill it in if the overall scoring method is weighted categories.
NOTE: category weights are required to add up to 100. Not Doing so, will result in incorrect scores.
Throw Out - Enter the number of assignments in the category you wish to be thrown out. Only assignments that hurt the student's grade will be thrown out. If an assignment helps a student it will not be thrown out, even if there is a number entered here.
Default Points - This is the default number of points an assignment is worth in this category. This can be altered while creating an assignment, and is not set in stone.
Weight Method - Finally, you need to select a category weight method. This determines how a category will be scored. You will be given the following options: Weight Each Category and Each Point Equally.
Note: for more information about these options, see Basic Setup's Overall Scoring Method section for more details.
¶ Modify an Existing Category
To modify an existing category is made simple with all the information given to you in the Categories module. Change a value and hit Save Setup at the bottom of the page, or the save button in the bottom right of the screen.
¶ Hiding a Category
To hide a category, select the checkbox at the very right end of the table in the column labeled Hide. After selecting this checkbox, use one of the save buttons and the category will be removed from your normal list of categories.
Can the category be shown again?
In short, yes! We've added the ability to hide/show categories to remove unnecessary categories from your list. However, if you happen to need a category with the same name then showing it again is better than creating a new one.